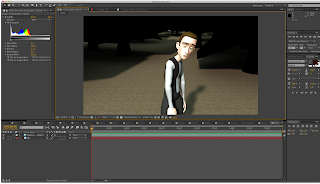
For my final piece of motion capture I planned out a scene where I would recreate an environment of a shop window and a collection of mannequins in that window. One would come alive and be confused as to what happened and why they can't get out. I captured this performance using a two camera setup as there was more movement than my previous tests. The data that I obtained from this was very messy and involved a lot of cleanup, to a point where it probably would have been just as quick or even quicker for myself to keyframe the animation. What I have managed to clean up is shown below. That is the stage where I've got to at the minute, I've had to adapt a lot of the motion as it was all in the wrong position and over rotating in some joints. The movements are quite jittery in places and very snappy, I've tried adjusting this and it has reduced the amount, however it's not to the standard as I would have liked. I want to try and put some more personality into the movements and adding that appeal, I'll try this out using animation layers so that it's not destructive on the base motion and I can always delete it if it's not working out.
I've been using markerless motion capture, a technology that is fairly recent and due to that fact it doesn't seem to be very accurate when compared to marker motion capture such as Vicon. This is one reason it's taken myself a lot longer to get it to a workable stage. I feel like I could animate it a lot better and with more ease if it was from scratch, and right now I do not feel comfortable with what I'm achieving. I don't know if I will be able to get the motions smoothed out like I would with keyframe animation and it's frustrating me that I can't figure it out.
Tuesday, December 24, 2013
Scared Animation / MoCap
Another one of my tests with motion capture was to create a reaction to something, in this instance I chose to capture a scared/shocked emotion. I did this with a one camera setup as there wasn't any movement that would go behind the body and therefore not be captured by the camera. I tried two different ways of retargeting this time, one within Mocap Studios and my original way within Maya. The two videos below show the original mocap that was done within Mocap Studios, and the one below in Maya. What was interesting to see was that when retargeted using the iPi software, the original data came out quite well and accurate, more so than doing it in Maya. The only issue with this process is that only fbx models could be used to import and I was not sure how to export one of my own models with the rig out as an fbx and into Mocap Studios. In Mocap Studios, you have to connect each joint from the data skeleton to the imported character joints, and I wasn't able to do this with my own model. In order to get more practice with cleaning up the data and using my own model I think I'm going to stick with retargeting in Maya.
As with my previous mocap test I also created a keyframe version. This time I keyframed using my own reference and from this I also created a more exaggerated animation ontop of the base animation. I did this using animation layers. Because I've used the Stewart rig from Animation Mentor, there is immediately more appeal in terms design. In the exaggerated animation there is more of a reaction and it comes across more vividly than the base animation or mocap version. To make it more appealing I would need to concentrate more on the line of action of the body and the arcs that are being created. These arcs are a natural motion and add appeal to movements. It's easier to create these with keyframe as you are starting from scratch, I'll try and implement these techniques into my motion capture to see how much I can edit the motion yet keeping the main performance at the core.
As with my previous mocap test I also created a keyframe version. This time I keyframed using my own reference and from this I also created a more exaggerated animation ontop of the base animation. I did this using animation layers. Because I've used the Stewart rig from Animation Mentor, there is immediately more appeal in terms design. In the exaggerated animation there is more of a reaction and it comes across more vividly than the base animation or mocap version. To make it more appealing I would need to concentrate more on the line of action of the body and the arcs that are being created. These arcs are a natural motion and add appeal to movements. It's easier to create these with keyframe as you are starting from scratch, I'll try and implement these techniques into my motion capture to see how much I can edit the motion yet keeping the main performance at the core.
Tuesday, December 17, 2013
Two Camera Setup - iPiSoft
For the past few tests that I have undertaken, I have just used a single Kinect camera. This is fine for recording performances from the front that will not really have any actions that will disappear from the cameras view. I decided to try out a two Kinect setup, where each Kinect is placed at around 60 degrees between each other. Because there are two cameras, a calibration process needed to take place in order to determine where both cameras would sit in 3D space. I held up a piece of cardboard and moved this from one camera to another whilst stood in the same place. After this I was then free to record my performance and take the data into mocap studios. The calibration video needed to be opened up into mocap studios and for it to calibrate based on 3D plane. By saving this file it would then use this as a reference when opening up the main motion capture data file.

Below are two videos showing the raw data and the cleanup. I found that with two cameras it had stabilised the feet more, however it didn't capture the movement of the left arm very well. This could have been down to the calibration setup and I will need to check this before I go on to creating my final animation. Even the raw data is quite accurate, more than what a single camera setup would give me. For the cleanup I had to put in the movements for the left arm myself as this was not captured, I also corrected the feet and spine. The rigged model I've been using is my own that I managed to fix from my previous attempt. It still needs some more adjusting but it's given me a decent result this time round.

Below are two videos showing the raw data and the cleanup. I found that with two cameras it had stabilised the feet more, however it didn't capture the movement of the left arm very well. This could have been down to the calibration setup and I will need to check this before I go on to creating my final animation. Even the raw data is quite accurate, more than what a single camera setup would give me. For the cleanup I had to put in the movements for the left arm myself as this was not captured, I also corrected the feet and spine. The rigged model I've been using is my own that I managed to fix from my previous attempt. It still needs some more adjusting but it's given me a decent result this time round.
Monday, December 16, 2013
Clumsy Ninja
I recently downloaded a game for iOS called Clumsy Ninja, I was initially intrigued about the style and how the animations would look. After playing it for a little bit I was really impressed with the overall aesthetic style and the animations, I decided to look into how the animation was created and found out that it is actually AI based.
"Normally, game designers have to create painstaking animations that model every possible kind of behavior. They predefine what a game character will do based on certain inputs. But with Clumsy Ninja, NaturalMotion’s designers don’t do that. Rather, they create the character from the bones up. They do that just once. They imbue the body with physics, based on the Euphoria engine. So the arms will move like arms and limbs will behave in a realistic fashion. They marry that to artificial intelligence, which tells the character what to do in a given situation. Then they essentially let the character loose in a game world and see what happens.
With canned animations, all you can do is play back an animation in response to something the gamer does. Clumsy Ninja can generate procedural, or on-the-fly, animations, based on actions taken by the A.I."The standard of the animation is something you could see within short animations or even feature length films. There are some places where you can tell that it's based on physics simulation, however the majority of it I was very impressed by. It's interesting to see that this high standard can be achieved with AI and physics and that each animation is calculated in realtime. Seeing how far this can go in the near future will be great to see and what it can be expanded to from just a mobile game. As great as it is to see this technology, the animator inside of me is a bit sad that this wasn't keyframed. With the type of interaction that it entails, I can understand why it made sense to go for more physics an AI, but it would have been great to see even small sections or movements that were keyframed.
Friday, November 29, 2013
Synthesis Crit
A few weeks ago we had a synthesis crit where we presented our ideas, research and any practical work, showing how we were going to synthesis both practice and theory together. So far I had produced some practical tests of motion capture and also keyframe animation to see the difference between the two and how it would affect the overall performance of the character. Something that I've come across whilst doing this is that the rig that I've been retargeting the motion capture data to, doesn't have as much control as I would like. There aren't enough controls for certain parts of the body e.g the spine so I find that when I need to tweak parts of the motion capture data in the spine, it's not that easy and sometimes not possible to get to certain joints. To get around this would be to build my own model and rig (which I've done in a previous post) where I'm able to add in as much control as I need.
Regarding the synthesis part, I've been researching into the pros and cons of motion capture along with performance, appeal and realism vs believability. All of this will help inform my practice by giving myself prior knowledge to what will work better e.g certain softwares, performance and animation techniques, what makes a believable character/performance. I will incorporate this into my work and whatever I produce I will end up with my own findings which I will then relate back to my writing. I will be learning throughout and making links between both aspects.
Because I'm looking into performance and aiming more at film rather than games, it will be good to give my final animation a story, something I can work with that will make the whole thing more believable. In order to give a good performance you should understand your character first. A story can also add appeal in the form of how the character may react in certain situations. It will be interesting to see how it all turns out and if I come out of it with any new findings.
Thursday, November 28, 2013
BAF Game
This year I only attended a few talks at BAF Game, ones that would be of most relevance towards my dissertation. The one that I really enjoyed the most was a talk from Warren Spector who designed Epic Mickey. It was great to see game animation that embodied some of the 12 principles of animation and had that appeal that you wouldn't necessarily get from other games. Mickey Mouse is such an iconic character and because of this the animation and style had to be recognisable to his original form. Luckily Mickey is a very adaptable character, over the years he has had many different design iterations, for a game though he had to come across as a 'hero'. The team had to make Mickey look like a hero but also have his original appeal.
The animators did a great job with all of the animations. They used old Mickey cartoons as reference in order to get his movements correct, they did these so well that when composited in the original scene, people couldn't tell that it was 3D. I was immediately drawn to the animation when Warren showed us at BAF, I went and bought the 2nd one for myself and the animation really impressed me. Because of it being a game, the animations have to seamlessly intertwine with one another. When a player wants to change actions, the movements have to change at any point and without being noticeable. Game like Epic Mickey make game animation more appealing for myself, right now I'm looking at feature film animation or commercials. Unless it's cinematics I find game animation somewhat repetitive , yet with Epic Mickey it feels more refreshing and exciting. It's combining the exaggeration of animated characters into game format.
The animators did a great job with all of the animations. They used old Mickey cartoons as reference in order to get his movements correct, they did these so well that when composited in the original scene, people couldn't tell that it was 3D. I was immediately drawn to the animation when Warren showed us at BAF, I went and bought the 2nd one for myself and the animation really impressed me. Because of it being a game, the animations have to seamlessly intertwine with one another. When a player wants to change actions, the movements have to change at any point and without being noticeable. Game like Epic Mickey make game animation more appealing for myself, right now I'm looking at feature film animation or commercials. Unless it's cinematics I find game animation somewhat repetitive , yet with Epic Mickey it feels more refreshing and exciting. It's combining the exaggeration of animated characters into game format.
Monday, November 25, 2013
Cloudy with a Chance of Meatballs 2
I went and saw Cloudy with a Chance of Meatballs 2 the other week after much anticipation. After seeing the first one when it first came out I was blown away with the animation and I love the aesthetic style of the characters. 4 years later the sequel came out and I thoroughly enjoyed it. I was able to watch it with a greater knowledge of animation and notice things that I wouldn't have known about when watching the first film back all those years ago.
Cloudy is one of those films that is extremely cartoony, the animation is over the top and in many scenes the characters aren't restricted by human constraints e.g. stretchy limbs and breaking of the joints to create a more fluid motion in the arms or legs is a common feature that arises in both films. In animation you can break the joints, but it should be done in a subtle way that can enhance the pose, however because this film is so stylised it can get away with it as it fits in with the overall feel and aesthetic of the animated feature.
I've always been a fan of this style of animation and it seems to be an occurrence with Sony Pictures Animation as they used this style in Hotel Transylvannia. It's taking the poses and really pushing them to get an appealing performance. As an audience, you know that movements like this wouldn't really be possible as a human yet it is so enjoyable to watch. I think depending on the context of a scene would determine whether this type of animation would be suitable. As you can see with Cloudy it's not used throughout the film, just in certain places to convey emotions such as, panic, excitement, fast past action etc. Having a whole film in this extreme cartoon style would be overkill and it would lose its appeal.
I would really love to try out this style at some point as it's something I've held back on so far. It would be interesting to see how I would take to it and what I could achieve. What I might do for a test and to get to grips with this, is take an over the top movement from Cloudy and try and replicate it myself, then from this I could hopefully go on and create my own shot/scene.
Monday, November 11, 2013
Practical Element - Character
Through testing out motion capture and retargeting mocap data onto rigs, I have found out that I'm not able to get the amount of control that I would like from some of the rigs. Also with the rig that I have been using I still find that it is not plain enough for it not to have any contributing factors to deal with aesthetics. As I am focusing purely on the animation and performance I don't want the model or textures to affect this. To overcome this I've modelled and rigged my own character. I've tried to create a model that doesn't have appeal in the way of design or textures, and to make sure that it doesn't fall into the uncanny valley I've taken away the face and hands and replaced them for basic forms. Eye lines are one of the key factors to any performance, but it can also be the tipping point for something to be uncanny or not. The eyes need to be believable and not feel 'dead'. As there is no face it wouldn't look right aesthetically to have human like hands, by creating mitten hands it also allows me to spend more time on the mechanics of movement and the pure performance. The iPi software doesn't capture finger movements, only the wrist action so I would have had to add these all in myself using keyframe.
I used the HumanIK system within Maya to set up my skeleton. When you retarget the data to a rig, you first have to make sure that the rig is characterised and you do this within HumanIK, so it made sense to create a rig in this way. I've weighted all the joints, however I'm having a few issues with the controls. With HIK it will set up the controls for you, I need to go back in and check a few things out, however when I tested it earlier the controls weren't working as how they should be. I may find out that I will have to put the controls in by hand (which isn't a major task) the worst case scenario would be having to delete the rig and start again, but this time rigging it by hand. Hopefully it won't come to this and that I can get it sorted soon. Once it is sorted though, I plan to put my old mocap data onto this rig just to see how it works. I may still need to tweak it and adjust a few things at that point. I want to make sure the rig is working to the best that it can before I move onto my major piece of mocap animation.

I used the HumanIK system within Maya to set up my skeleton. When you retarget the data to a rig, you first have to make sure that the rig is characterised and you do this within HumanIK, so it made sense to create a rig in this way. I've weighted all the joints, however I'm having a few issues with the controls. With HIK it will set up the controls for you, I need to go back in and check a few things out, however when I tested it earlier the controls weren't working as how they should be. I may find out that I will have to put the controls in by hand (which isn't a major task) the worst case scenario would be having to delete the rig and start again, but this time rigging it by hand. Hopefully it won't come to this and that I can get it sorted soon. Once it is sorted though, I plan to put my old mocap data onto this rig just to see how it works. I may still need to tweak it and adjust a few things at that point. I want to make sure the rig is working to the best that it can before I move onto my major piece of mocap animation.

Animation Competition - Joy
Seeing as I have been entering a few 11 Second Club competitions, I wanted to try and find another type of animation competition. I came across this one that is run by Splinebomb.com. I thought it would be quite a good one to enter as you are given a emotion to portray, in this case it's 'Joy' and there are more stricter rules to follow which gives me good practice to working to a specific brief. I'm only allowed to use one character, the shot should be no longer than 6 seconds and no music should be added. Without the use of music you are just purely concentrating on the performance and animation.
I've come up with an idea for the shot that I want to produce, a girl playing with her teddy bear and hugging it tight and smiling. For this I knew I would need to model my own teddy bear and probably rig it in some way in order to get movement out of the legs. Even though it is an inanimate object, something like a teddy bear will still have movement when picked up, held etc.
Below are some screenshots of my finished teddy bear and its rig. I was planning on using the HumanIK system to generate the skeleton for me, but I had issues with mirroring the joints. I found it a lot easier to place the joints in by hand and constrain everything like I've done before. Because of the bear's simple shape it wasn't too much of a hard task to get this all done.
I've started setting up my scene and I'm planning to start blocking this out this week. I have until the 30th of November so I think I'll have enough time. The rig that I have chosen to use for the girl is the Andy Rig by John Doublestein - I wanted to try using a rig that I haven't used before and I found this one seemed quite good and you are able to change the appearance of the rig from male to female and also the clothes and hairstyles.


Wednesday, November 6, 2013
Ratatouille
One of the films that I'm going to look at for my extended writing piece is Ratatouille. As I'm going to be researching into appeal and performance, Ratatouille is a really good film to look in to as Pixar managed to make a rat appealing to the audience. A lot of it was down to the design of the characters as this is the immediate thing an audience would see, they needed to take previous misconceptions away from rats and portray them as something cute and appealing.


With Emile it was a lot easier to make a chubby rat more appealing as this in itself makes something a lot more cute. Adding the type of personality that Emile has also adds to the appeal, clumsy yet friendly and most interested in his food. Through personality traits this can influence the animation style and performance. The 12 principles of animation will always play a bit part in any animation work, arcs, follow through, overlapping action, arcs, exaggeration, appeal, solid drawing etc - they all create a more realistic performance but in a stylised way. Animation performances can be extremely exaggerated but the characters still need to be believable and connect with the audience. For Ratatouille, one thing to pick up on is how the rats run, it's very quick but has a rhythm to it. The animators studied real rats and how they moved and interacted with objects, by understanding the real motion they could then take this and adapt it to produce a performance that expressed personality and charm."If the visual qualities of character get the viewer’s attention during the storytelling, that’s appeal."


Friday, October 25, 2013
L.A Noire and Facial Capture
L.A Noire (2011) used the MotionScan system (created by Depth Analysis) for which it recorded facial motion capture. It was vital that they got accurate facial capture in order for players to be able to tell when a character is lying. MotionScan is markerless technology so there is no need for actors to be put in any type of suit or have markers on their face. This reduces the time it takes and adds an ease to the whole process, it took around 30-60 minutes to scan the whole head. From here the actors would then be recorded in the capture stage where 32 cameras were setup in order to capture the whole head. Deph Analysis were able to record audio at the same time as the facial capture in order for it to all sync up. The body and neck movements come from a separate session of motion capture, the problem with this is that the body can sometimes look disjointed from the head and the movements aren't as natural and realistic as the facial expressions. It somewhat breaks the players immersion and for myself, I found it really noticeable.
The faces themselves are very realistic and almost an exact match to the actor's face. When captured, the faces are of a much higher resolution (more suitable for film) so when transferred in game, it loses some of its quality but the core believability is still there. There are some eye movements which sometimes takes away from the realism of the characters yet it's not at the point of the Uncanny Valley. L.A Noire hasn't fallen into this category, normally when games or films attempt to achieve really realistic results, it ends up becoming eerie and feeling 'uncanny'. It's been said that because of the MotionScan technology that this was the main reason for escaping the Uncanny Valley. Because of the high realism in the face, it didn't have that 'fake' feeling or any of the eeriness associated with the uncanny.
As the MotionScan system eliminated the need for data clean-up, it increased the amount of animations that were produced a day. Around 15 minutes of animation were achieved a day, in which an animator could spend almost a week cleaning up that data alone. Since the game was released in 2011, Depth Analysis is aiming to increase the capture resolution so that it can also include full-body. This will be really beneficial and will be interesting to see the progress of this. When this is complete it will be great to see how they compare together - the facial capture with separate motion capture data for bodies and full-body captures."We didn't want animators touching up the data. Each time you do that, you lose a bit of the personality. We wanted LA Noire to be as authentic as possible" - Oliver Bao, head of research, Depth Analysis
The faces themselves are very realistic and almost an exact match to the actor's face. When captured, the faces are of a much higher resolution (more suitable for film) so when transferred in game, it loses some of its quality but the core believability is still there. There are some eye movements which sometimes takes away from the realism of the characters yet it's not at the point of the Uncanny Valley. L.A Noire hasn't fallen into this category, normally when games or films attempt to achieve really realistic results, it ends up becoming eerie and feeling 'uncanny'. It's been said that because of the MotionScan technology that this was the main reason for escaping the Uncanny Valley. Because of the high realism in the face, it didn't have that 'fake' feeling or any of the eeriness associated with the uncanny.
Thursday, October 24, 2013
Up and coming animation festivals
Last year I attended a couple of animation festivals - Bradford Animation Festival and Animex. I loved both and gained so much out of both. This year I'm only attending a few talks at BAF Game (mainly to help with my research for COP3) however I'm still planning to absorb all that I can and as I'll be attending some talks from animators I know that I'll get lots out of it. I think I'll also be attending some of the networking events held at both BAF Game and BAF - I'll be more prepared as I have complied a showreel that I'm fairly happy with and includes more highly polished animation than last year. I would also love to go back to Animex in February (money dependant) as last year it was invaluable. The range of speakers were great and I took something from each of them, even if they weren't an animator.
A recent festival that just passed was BFX held down in Bournemouth. This was the first year it had started up and it would have been nice to go however I had already moved back to uni and quite a few of the speakers I had already seen at Animex. It's definitely one to attend next year, especially for their careers advice and having industry people there to talk to about getting that all important job.
FMX is still on my list of animation festivals to go to but it's just the cost. I was annoyed that I didn't get the chance to go last year (and I doubt I can afford it this year) but there were some live streams that I got to watch so hopefully this year they'll be doing those again. It would be great to get myself over there as they too have a lot of industry professionals giving careers advice and there are many masterclasses and workshops.
There are a couple more conferences I would love to go to one day and I would have to save a lot up for this but it would be more than worth it. SIGGRAPH and CTN Animation Expo, both are world renowned and would be just incredible to go to. The speakers they have at each at always major industry professionals, people you look up and aspire to. Back in 2012, Glen Keane gave a talk on how he animated Disney characters (luckily I was able to catch this online) and it was so inspiring. It opened my eyes to the smallest things and I gained so much from it. That's what I love about festivals and conferences, there are people there that love what they do and have so much knowledge in their field, you can't help but be inspired and be motivated to do more and become the best that you can be.
Animator? I Think so
PPP3 this year is all about preparing ourselves for when we graduate. We need to be ready for life after uni and where we see ourselves being in the future. For a very long time now I've known that I've always wanted to be an animator and I've never strayed from that path, if anything these past 3 years have made me even more certain about wanting to succeed in this profession and knowing for certain that an animator is who I want to be. As I've known for a while now, I've been slowly gathering my own database of websites and communities where I can publish my work and get feedback, whilst also meeting new people in my creative field, such as:
- 11 Second Club
- ShowMeTheAnimation.com
- Tumblr
- YouAnimator
- IdeasTap
I've also got a lot of useful links on finding jobs, where a lot of cg studios are and how to best tailor showreels but I'll go into more detail with that in another blog post. There's not a lot of time this year so every minute has to count. It's going to be exciting but also scary stepping out into the world of work but I can't wait for it! Hopefully everything that I've been doing over the past few years will help me a lot; all I can do now is to just keep going with it and animate as much as I can.
First Mocap Test with iPi Soft
On Tuesday I did my first test with iPi Soft - markerless motion capture. This is the main piece of equipment I'll be using for the practical side of my extended essay. I had previously tested it out during summer, however I wasn't able to export the data out due to it being a trial version. Because of that test though, I knew the basics of setting it all up and recording. When setting up the Kinect for recording you have to sort out the background first. Choosing depth mode when in the recorder allows you to see different colours, the main thing you want to get rid of is any areas of yellow so the Kinect can get the best scan as possible. Another thing to consider is what clothing you wear, you want slim clothing and if you have long hair, to tie it back. (I didn't tie my hair back so the head on the pure motion capture test was very wonky)
For this initial test I just used one Kinect. The more you use the better the scan, but it also takes longer to process. There wasn't much movement happening in this test, so one Kinect was more than enough for what I wanted to capture. Before recording you must take a snapshot of the background (once this has been done the camera cannot be moved), then you can go ahead and record. The actor must strike a T-pose before commencing any main action as this will help with the building and tracking of the character.
Once this was all recorded there were a few options within iPi Mocap Sutdio to edit the data and fit it onto a character. Using the tools such as refit pose (the model will be fitted to the motion capture data) and track forward (tracks the data onto the character) will get you what you need for you to export the bvh file and take it into another programme. It is also possible to import a pre-rigged character into Mocap Studio and retarget the data to it there. This eliminates the need for another piece of software such as MotionBuilder.
I tried taking the bvh file into MotionBuilder and editing it there, however I had some issues with it and wasn't able to pin the feet down too well. I thought by flattening out the F-Curves it would hold the pose, yet this wasn't the case. This test had a lot of issues with the feet, and this may have been due to the floor being shiny - it may not have coped very well with this. Hopefully the next test I do might work out better as I plan to do it on carpet.
I took the fbx file into Maya and retargeted this onto a character rig. I followed a tutorial with Digital Tutors which helped me greatly with this stage. Within MotionBuilder it is a much simpler process, however in Maya it takes a lot longer to do. Luckily a script was provided in order to speed up the whole process. Without it you would need to group each control and create other groups for retargeting. All in all it wouldn't have been as simple as MotionBuilder. To clean up the data I had to bake the animation and then simplify the curves. By simplifying it reduced the amount of keyframes there were and I was able to then go in and edit. I found this stage quite easy and had no issue with cleaning it up. Because of the restricted space that I worked in, the jump that I performed was very unenthusiastic with not much energy, so when cleaning up I thought I would make it more obvious that it was a jump and pushed it a bit further (without making it too exaggerated as this is what I want to keep for the pure keyframe animation version).
As you can see below, the first video is of the pure motion capture data that I retargeted to a character rig - provided by Digital Tutors. Underneath that is the cleaned up motion capture which I keyframed in order to correct the some of the movements. I had to do a lot more clean up and editing of keyframes than I had anticipated - this may have been due to the environment affecting the data capture. Maybe next time it might take less time but it all depends. Motion capture and keyframe could take up to the same amount of time.
Monday, October 21, 2013
Animation - Personal Project
I've recently been finishing off an animation I was doing as a personal project. As I had been doing a lot of animation with male characters, I wanted to have a go at animating a female. I decided to use the female mod of malcolm as I'm quite comfortable with it and wanted to see what I could achieve. I took the sound clip from 'My Best Friend's Wedding' as I really liked the tone of voice and thought I could play around with expressions a bit more.
Coming from my 11 Second Club entry in August, I tried to improve my animation and the flow of all the movements. I've paid a lot more attention to the whole body this time as back in April I realised that I just focused on the top half of the body. When one part of our body moves, it has an affect on other adjoining bones, so I made sure that there was movement throughout the body but in a subtle way. As always I took reference videos to help plan out my animation and made sure I created a thorough blocking pass before moving onto splining. The splining process, I did a bit at a time so it was more manageable and this way I could concentrate on each section and really try and polish them off. I've been trying to understand more about the graph editor, overshooting keys and breaking tangents to get more subtle changes between each motion. There's still a lot more I feel like I don't know and what I really want to try next is more exaggerated animation. The animations I've done so far have been quite realistic in the way I've followed my own reference almost exactly. I need to try and break away from this and really push the poses some more and go a bit more over the top with it.
The animation that is below is almost complete - I had already uploaded it to Vimeo as at the time I thought my file had corrupted and wasn't able to complete it to the extent I wanted to. Turns out it is fine now so I'm planning to go back to it and edit the eye darts, lip sync and render it out fully so it is showreel worthy.
Dumbest Thing from Siobhan Parkhouse on Vimeo.
Retargeting options
One option for my practical piece of work is to explore the option of retargeting with different pieces of software e.g within MotionBuilder or Maya. Retargeting is the process of transferring motion capture data onto another rig where it is then possible to clean up and edit. At the minute I am far more accustomed with Maya so it may seem that I find the process a lot easier, however what I'm finding at the minute is that the process seems to be much more complex than with MotionBuilder. It will be interesting to see which technique will be more beneficial to myself, not only for how long a process will take but also the results that it produces. Right now I will be testing out the Maya approach and then I will move on to retargeting within MotionBuilder.
When it comes to retargeting within Maya you need to have a compatible rig. For this you need to either define an existing rig or create and define one from scratch. I will be trying out both techniques, for the existing rig it will be using one from Digital Tutors. Creating and defining from scratch is an option to consider and possibly taking further as this would allow myself to have my own model and rig that using the HumanIK system. Initial ideas was to possibly do a collaboration with Alex on my course, however it will depend heavily on our time constraints and available equipment on my part. As of now though, I am just working on tests to see if it would be possible and to create my own body of work that will help explore themes within my extended essay.
Thursday, October 10, 2013
Quick Motion Capture Test
Before I start properly on the practical side of this module I thought I should try out cleaning up some motion capture within MotionBuilder then taking it into Maya. I've been watching tutorials over the summer about how to use MotionBuilder as it's a new software that I will be taking on. The tutorial I followed for this test was from 3D Artist, Issue 58. Using the motion capture data that came with the magazine I plotted it onto a standard character in MotionBuilder, cutting up the data sequence in order to get a specific part of the run. It wasn't as easy as I thought it was going to be and I'll definitely need some more practice with the software as a whole.
Motion capture needs to be cleaned up as a lot of the time there will be sliding of the feet and some unnatural movements may also occur, e.g flipping of the joints. I managed to clean up some of the feet but I think it could still be improved more. I'm used to having a rig that I can have full control of e.g foot roll so I'm trying to learn how to compensate for this. The motion capture data I was working with was from optical motion capture, I however will be using markerless motion capture. I hope this won't affect the quality of the data and that I'll still be able to achieve good results with it.
One thing I need to test out is editing motion capture within Maya, I know it's possible to do however I need to explore this option some more and see if it requires a specific file type. The ideal situation would be to use MotionBuilder as part of my pipeline as this is industry standard. This is just the start so I'll have to keep testing and see where it gets me. Once I get the hang of it I'll be able to then implement my theory and knowledge of motion and performance to the characters and see if this has an effect on the overall appeal of them.
Sunday, October 6, 2013
Final year begins...
Before I broke up for summer, I had to start thinking about what I wanted to do for the upcoming module, Context of Practice 3. Unlike previous years, this had now changed from a dissertation to an extended writing piece with a synthesised practical. With this in mind I immediately knew I wanted to base my practical around motion capture and the essay side to combine keyframe animation (which I specialise in now) and compare it to motion capture. One of the main reasons for doing something like this is so that I can explore a new technique and to broaden my knowledge within the animation field. At the minute I'm currently looking around the idea of 'keyframe animation vs motion capture - how this can affect the overall performance and appeal of the characters' - This is subject to change and is not a definite title as of yet. Over the summer I've been researching into several different topic areas I may cover such as, The Uncanny Valley, appealing animation, pros and cons of mo-cap and also learning the softwares I need to use in order to create my own pieces of motion capture.
For the practical side of the module I'm hoping to do some shorts tests to compare and contrast the animations between mocap and keyframe. The keyframe animation I'll be doing myself, using the raw footage of the motion capture as reference. I'm planning to exaggerate the performance and see if I can achieve more appeal in the movements and the characters. A possibility at the end may be to combine both motion capture and keyframe within the same scene to see if visually, whether or not there is a noticeable difference.
Throughout this module I'll be posting up my research and findings on the subject and will be heading off to BAF Game for some specific motion capture talks and workshops. This should all benefit myself a great deal and I'll be able to implement this into my essay. I hope to get some practical tests up soon, right now I'm planning on using iPi Soft - markerless mocap and then taking this into MotionBuilder for cleanup. I'll also be keyframing other animations and will be sticking with Maya for this. I'm looking forward to seeing how this all ends up and the research I've done so far has really intrigued me and I can't wait to really get started on it all!
Thursday, September 5, 2013
11 Second Club - August
So it's been awhile since I last posted but I've been doing other animations in my own time including 11 Second Club in August. Compared to my previous entry I can really see the improvements. I really tried to use more controls and add in those subtle movements of the body. The woman was a lot more successful than the man, though I'm pleased with how his hand moves across the chair. I still need to work on my walks, this seems to be quite an issue at the minute but hopefully I can sort it out soon with more practice.
I got some good feedback overall and I'm happy with my progress. It's given me more confidence in my work by seeing how I have improved so now it's just down to more hard work and practice! I've got another acting shot currently blocked out that should be done quite soon, and then after that I think I'll be moving on to experiment with motion capture. If I get time hopefully I can put in for another 11 Second Club - it's always great to work on personal work, even with a given piece of dialogue.
11 Second Club - August from Siobhan Parkhouse on Vimeo.
Wednesday, May 22, 2013
Animation...near complete
I had a lot of issues with the animation as I was going through this module and found myself getting very overwhelmed by the whole task. Looking back at it now I feel like I could have done a lot better on some shots. I made the mistake of not create playblasts of some shots so the animation ended up being quick 'jolty' without myself realising until it was rendered out, at that point it was too late to change anything. I think I'll go back to it at some point and change the shots I'm not happy with, but for hand in it'll have to do. I didn't think I would get it all rendered out and completed on time so I'm impressed with myself that I got this far.
There are some shots where the lighting could be improved upon, the images below show the ones I'm on about. In one shot the man's face catches the light too easily and it can be quite noticeable. I tried turning off the shadows and making his face not casts shadows but this didn't work. In another shot I think I forgot to put another light in, hence the dark forest in the background. Just little things that could easily be fixed if I had a bit more time. I took each image sequence into After Effects to export out and also tried to do any subtle colour correction here. I also created the title and credits in After Effects too.

There are some shots where the lighting could be improved upon, the images below show the ones I'm on about. In one shot the man's face catches the light too easily and it can be quite noticeable. I tried turning off the shadows and making his face not casts shadows but this didn't work. In another shot I think I forgot to put another light in, hence the dark forest in the background. Just little things that could easily be fixed if I had a bit more time. I took each image sequence into After Effects to export out and also tried to do any subtle colour correction here. I also created the title and credits in After Effects too.


Sound
I wasn't able to look for a soundtrack for my animation as I didn't think it would be complete on time. I didn't want anyone putting the time in for an unfinished piece of work. What I might do however is to see if someone wants to compose a soundtrack for me after the deadline. It will probably be easier this way as everything will be timed out and no changes will need to be made to the animation.
What I have done is sourced sounds from the BBC Sound Library just so that it helps my animation along. I realise that there are a few sound effects that I'm missing but I wasn't able to find these at a short notice. The soundtrack that I have included will probably just be for temporary purposes, I found it from Soundtrack Pro and just thought it would be better to have a simple sound over the whole animation as without it, I found it quite bland.
I've had to match up the dialogue to the rendered out shots in Final Cut Pro, it's as close as I can get it, but think in some areas it's a bit missed timed. I think next time I'll make sure that both my animation clip and dialogue starts at the same time in order to make it sync up perfectly.
Tuesday, May 21, 2013
Animation Showreel 2013
I created a new showreel a few weeks back to include some more recent work. I've improved my animation skills a lot since my last showreel, so I thought it would be best to update it. I included my entry to 11 Second Club and also a weighted animation, along with scenes from the VFX module. I think it shows a range of animation skills but also shows my improvement over the course of 4 months. I showed this at the last All Animated meeting and got some nice feedback from it and it was nice to hear that other people thought I had improved a lot too. Keeping your showreel up to date is always a crucial thing, skills can easily be improved and new work produced, you just have to make sure that what you put in your showreel is the work you are most proud and confident about. If there is ever any doubt in your mind about a piece of work, don't put it in. When it comes to show your showreel to other people you need to be able to explain your work and your love of what you do needs to come through this.
Animation Showreel 2013 from Siobhan Parkhouse on Vimeo.
Animation Showreel 2013 from Siobhan Parkhouse on Vimeo.
Assets Collaboration
Because my focus for this module was to be animation, I sourced the help of a friend to create my tree assets and the texture for my cabin. I met Arron Walker through twitter and he was a recent graduate from Nottingham Trent Uni. It was a win win situation for both of us, it freed up my own time but allowed him to create more assets for his own portfolio whilst getting experience working with someone else. His previous work is more realistic so it was a good challenge for him to work on my project as I wanted something a bit more stylised to fit in with the design of the characters.
I gave Arron some rough concept art and moodboards to go off of and from here we decided upon pine trees as these were the easiest to create and allowed them to look similar to one another. He did still create a couple of variations, one of them being a tree designed more for the background, he created a feathered texture so this would suit trees further in the distance as to up close. Originally he was just meant to create the texture for my cabin, however once he got my basic model he decided to change it a bit and add in some extra geometry details. He created window panes, planks and made the steps for the cabin more 'worn down'. I really appreciate all he's done for me as it has allowed me to properly concentrate on the animation without having to worry. I trusted his judgement so didn't feel the need to check up on him all the time. The outcomes are great and fit in with each scene really well, I couldn't ask for better especially in the time given for him to complete these assets.
The last image shows how both assets look together within the scene, fully lit and rendered out.


Transmedia Aspect
As part of this module we have to come up with an idea of how our product could be expanded upon to create extended stories, characters or environments. Transmedia surrounds our society so by understanding and thinking about how my animation could be taken into a new medium will only be a benefit myself. By extending stories and characters through different mediums it can open up the world to a whole new audience than what it was originally intended for.
For my animation, I would propose that the story would be extended to the fox's point of view. The last shot you see of the fox is her running off to the woods. She would run back off to see her children and tell them her encounter with a human and how they need to be sly and cunning in order to escape danger. This extension of the story could be to tell children how animals need to be protected and shouldn't be hunted for their fur. The story could be told as an illustrated book to target it to a younger audience, however it could also be part of an anti fur campaign.
I took a pre-existing story and adapted it slightly by expanding on the characters and the environment they inhabited. Recently there has been a lot of animations that have been adapted from short stories and turned into feature films. This shows the versatility of stories and how easily they can be extended. Even though these animated films are still aimed at the same age group, it could still open it up to new people and people who have never heard of the stories before. Animated features are in high demand and by taking a story into this medium it can give the story a new form of popularity. This then can be translated into merchandise and games from that film. This list is extensive, is just needs the marketing and publicity to push it.
Monday, May 20, 2013
Chris Oatley: When Jobs In The Animation Industry Disappear
This post from Chris Oatley was posted a while back, showing his views on the state of the animation industry and how to cope with the lack of jobs being on offer at the minute. There have been a lot of layoffs within the animation industry lately, and as someone who is going to be graduating in a year it's quite worrying. The people who have been laid off have been in the industry a long time so going up against someone who is far more experienced than I am is quite scary. I need to remember to keep my morale up and don't give up.
Chris Oatley brings up a point: If your dream dies, what will you do?
I can't let dips in the industry discourage myself, I have to keep striving for what I love and my passion. I've come to realise that I don't get the same enjoyment or satisfaction out of anything but animation. Animation is my drive and I'm not going to stop pursing my dream, I may be scared or nervous about not finding that job but hopefully if I keep going for it, I'll get there one day.
I feel like I should be able to achieve my dream, I have the motivation, persistence and I always try and work as hard as I can. It will just be a matter of time and building up experience. All I can do is just keep working and improving. Practice, practice, practice.
Chris Oatley brings up a point: If your dream dies, what will you do?
I can't let dips in the industry discourage myself, I have to keep striving for what I love and my passion. I've come to realise that I don't get the same enjoyment or satisfaction out of anything but animation. Animation is my drive and I'm not going to stop pursing my dream, I may be scared or nervous about not finding that job but hopefully if I keep going for it, I'll get there one day.
No, I don’t think you can guarantee success with a great attitude, hard work and persistence, but you can guarantee failure without them.
I feel like I should be able to achieve my dream, I have the motivation, persistence and I always try and work as hard as I can. It will just be a matter of time and building up experience. All I can do is just keep working and improving. Practice, practice, practice.
No matter what, there will always be layoffs, in any industry you go in to, you just have to remember to keep going. If there are no jobs going, make some. Create my own projects to do in my spare time, by doing something it keeps myself proactive and shows that I'm not just sitting around letting my skills go to waste. This is something I will have to consider once I graduate next year, I'll most likely be moving back home until I can find a job so in the mean time I will have to keep doing small projects to keep my skills fresh. This would also be a good time to collaborate some more with other people and produce something we really like and enjoy.You have absolutely NO control over fluctuations in the economy or the waves of change in the industry.What you DO have control over is the quality of your work, your focus, determination, passion and imagination.If the animation industry is in a downturn, don’t go down with it.Stay strong.
Render Tests
I didn't think I would get to the stage where all my shots were ready to be rendered, however this is the case. The animation is some areas aren't as polished as I would have liked but the main 'storytelling' shots are the best I could of got it in the time given. To show my understanding of the whole process I needed to have at least some shots fully rendered out. I'm aiming to get it all rendered but with only 2 days left I'll have to see how far I get.
The image below is a test render I did for one of the shots (the cabin texture my friend created for me still needs to be added in, hence the black object). I changed the colour of the camera environment - this can affect the objects within the scene by adding a subtle colour tint onto them. Even though I'll be rendering each image out with an alpha, I thought I would put this on each camera as it gave me a good idea when I did test renders. I will be rendering out with mental ray as with the Morpheus rig, the skin textures are only visible using mental ray. This also allows me to have a higher polished shot, set on production quality. I have also turned on final gathering, keeping it at it's default setting in order to add in softer shadows and an all round good illumination to the scene. With the lighting, there is just one directional light in each scene with shadow rays turned on. Initially I had kept it on it's default settings, however I found the shadows to be too harsh so I increased the light angle and shadow rays to make them softer.
I really like how the test renders are turning out, the tree assets that my friend has created are great. They really fit well in the scene and the way he has textured them makes them seem soft and works well with the shadows and the style of the environment.

Sunday, May 19, 2013
Clothing for Characters
I had some spare time in between animating so I thought I would produce some quick textures for my characters. They're not great in all honesty, but it's what I could do in the short amount of time I had. Ideally I would have liked to have spent longer on the clothes but what I have done is better than the default and the orange jumpsuit test texture. I think I'll go back to this after I've handed in the module and adapt them somewhat, adding in extra details and personalising them some more. I went off my storyboards I created back at the start of the module and created something similar along the lines of 1900's style.
What I found is that it's really easy to add on geometry to Morpheus and for it to also add on the skin weights to the geo. For the woman, I created a basic skirt and all I had to do was select the geometry and the middle control of her, then click a button. Morpheus comes with a lot of scripts and these are what made it so easy to add on the geo. I tested it and it also allowed movement with the rig underneath, this in itself makes morpheus really adaptable and myself as an animator wont need to go through the whole painting weights issue for the clothing.

What I found is that it's really easy to add on geometry to Morpheus and for it to also add on the skin weights to the geo. For the woman, I created a basic skirt and all I had to do was select the geometry and the middle control of her, then click a button. Morpheus comes with a lot of scripts and these are what made it so easy to add on the geo. I tested it and it also allowed movement with the rig underneath, this in itself makes morpheus really adaptable and myself as an animator wont need to go through the whole painting weights issue for the clothing.

Thursday, May 16, 2013
Dialogue for animation
I wanted to include dialogue in my animation as this helped tell the story, but also allowed me to practice more lip syncing. It would have been nice to get more professional people to do the voiceover, but with time restrictions I just got myself and my friend to do it as I knew what I wanted to achieve and it was much easier and quicker this way. Because I was going to voice both the woman and the fox, I tried to change the pitch and tempo of the recording for the fox. I wanted it to be a bit softer and less harsh than what I created for the woman.
Using both my script and storyboard, I sent this along to my friend to record his part, it ended up taking a few tries as he did several different version and also tweaked things in accordance to my preference. When it came to blocking out the lip sync, all you have to do is just import the sound file into Maya and offset the time if needed. The way I've been doing lip syncing so far, is keying out the opens and closes of the dialogue, where the sound begins and ends. From here I then add in the narrows and wides of the sounds. I use the waveform in the timeline to give myself a basis of where the dialogue begins and ends and I can roughly use the peaks of the waveform to indicate the louder points / harsher sounding words.
The rig I'm using for the man is much more complex than the fox rig and has the ability to change the mouth shape, whereas with the fox the only control is the open and close of the jaw. Because it's not as flexible I will have to make sure the lip sync is spot on as it would be pretty obvious if the mouth didn't match up to the sounds. I will also have to make sure that the performance of the fox matches up with the dialogue and also enhance it.
Tuesday, May 14, 2013
Issues with animation
I'm progressing with my animation, however I know that it won't all be completed on time for submission next week. I'm going to try and get the most important shots done, polished off and hopefully rendered out. These will be the shots that will shows the most diversity and storytelling. I've struggled a lot with some of the scenes I set out to do, the one that really caused myself problems was the walk through the forest where the man is meant to be sad and defeated. I took reference of myself walking, however I just couldn't seem to get the motion and weight right. I'll work on it some more and hopefully be able to fix it or get it to a standard that I'm okay with.
I think what would have been beneficial for myself, would have been to get accustomed to the rigs before hand. I found that I was learning a lot about the rig as I went and it would have been better to use a rig that I was more used to. The Malcolm rig would have ideal to use as I have used it for previous work and find it really flexible and have a lot more control over it than Morpheus. The reason for using Morpheus was that it was easier to customise and change the appearance in order to make it my own character.
Initially I had planned for my animation to be around a minute, but after putting together the blocked out shots, it ended up being about 1:40. I'm not sure why it extended by so much, the lip sync may have been longer than anticipated and some shots may have been slowed down once I went about animating it properly. I did cut out a few shots that I found were unnecessary and didn't add to the story, however I forgot about other shots, which ended up bringing the total to around 21 shots. I think I've been a bit overwhelmed with this project and may have bit off more than I can choose. I'm going to try and get as much animation as I can do as possible, polishing and rendering out the most important shots. I will need to leave some time before the deadline to gather some sound effects to add in as this will just help move the whole animation along better.
Saturday, May 11, 2013
Progression of an Animated Shot: Gothel & Rapunzel Disney's Tangled
The video below shows the progression of an animated shot by Jamaal Bradley who worked on Tangled. It's great to see the whole process and for this project I created pre-viz (layout) in order for me to get the positions of the characters and timing roughed out before I dived into animation. With Jamaal, he also did 2D drawings, other animators I've seen have done thumbnails before animating, so it was interesting to see that extra detail he went into before going into blocking. I can see the benefits of this as it can flush out your ideas more and give you more of a basis to work off, and from here you have a better idea of what you want to act out in the reference videos. It's also good to see how even though he is a male, he does his best to put himself in a female role in order to get the references. I've mentioned in a previous post about the possibility of getting an actor in at another point to take reference from them, as good of as an idea this is, it worries me that I know what I want to get out of it, and whether or not the actor will be able to portray my ideas. A lot of animators take reference from themselves, I need to get better at it and put more emphasis in my actions.
Going through the whole progression you can see the different stages, and how many passes there are for blocking and splining. For myself, I think I need to work on defining the key poses more as when I've attempted it, and then went back to add in breakdowns/in betweens it's come out a bit messy and I've found it easier to just work my way through the whole scene. Most animators will do it Pose to Pose rather than Straight Ahead Action. The advantages of pose to pose is that it is planned out more and this is how key framing works when using the computer. I do work with poses, however I tend to put the breakdowns with the key poses and work with it all at the same time. I'm not sure if this ends up being more time consuming or makes it harder for myself, but I think I need to try defining key frames more and working with breakdowns as this is how it's done in the industry. Everyone works in their own way but when it comes to industry, there will be dailies where you show the progression of your shot, and I need to have the blocking of the key poses done to show. I can't try and have every detail blocked out as there won't be time, that's why it's broken down like it is. It's something I really need to explore and experiment with further.
Another interesting thing is that with the lip sync, it wasn't put in until the spline process. As I've mentioned, everyone has their own way of working, and for myself I've found it useful to block out the lip sync with the blocking of the poses. I picked up this method through Keith Lango, who produces a lot of great animation tutorials. To me it made sense with what he said about blocking, put everything in in order to get a critique because then you know you're showing everything you've got. The director then can see everything, he/she won't have to second guess about something because you haven't put it in yet. For myself as well, I find it easier to put in the lip sync along with the emotion of the face and the reaction of the rest of the body, it just all seems to flow with each other. Your body is always doing something.
It's really useful to see the whole progression of a shot and the specific in-betweens not just the basic blocking and straight to spline. I'm constantly learning as I go and this is just something to aspire to and to learn from.
Progression of an Animated Shot: Gothel & Rapunzel Disney's Tangled from Jamaal Bradley on Vimeo.
Reference Videos
Throughout this module I've been taking a lot of reference videos of myself as this is something that really helps me block out my poses. It helps me see the movement and how it travels across the body. As I've mentioned before I struggle with trying to put everything into my animations, so by breaking it down into a video I can see the different parts of the body in motion and I can translate this in my animation. With reference videos I know I need to put in more exaggeration and need to think like an actor and not be afraid of letting go. I never enjoyed drama when I was at school and have only recently got in to doing reference videos. A lot of the time it's for me to understand the mechanics of the body, but now I'm moving on to more performance as well. Something to take into consideration, is to possibly bring in an actor next year to really push the performance (more than I would be able to anyway) and see the different results I'm able to achieve.
I've heard a lot of the times that once you're blocking is complete, you should really move away from your reference videos, as this is the time where you can push the poses further and they are just really for the blocking stages. From here it's up to the animators to take it further and put their own spin on things. This reference video, is one that I tried to push a bit further than I normally have in the past. From this I got some good blocking which you can see below. The cameras probably need some adjusting, but animation wise I'm quite happy with it. As it's still in blocking, I haven't gone in and added all the overlap and secondary animation yet, but the end pose - the scream, I used my reference video as a basis and tried to push it that little bit further, especially in the facial expression.
I've heard a lot of the times that once you're blocking is complete, you should really move away from your reference videos, as this is the time where you can push the poses further and they are just really for the blocking stages. From here it's up to the animators to take it further and put their own spin on things. This reference video, is one that I tried to push a bit further than I normally have in the past. From this I got some good blocking which you can see below. The cameras probably need some adjusting, but animation wise I'm quite happy with it. As it's still in blocking, I haven't gone in and added all the overlap and secondary animation yet, but the end pose - the scream, I used my reference video as a basis and tried to push it that little bit further, especially in the facial expression.
Visiting Speaker - Tom Evans
We had a visiting speaker come in last week and talk about his work and journey in the digital industry, going from companies to now working as a freelancer. Below are the notes I took in his talk:
Freelance creative in the digital industry
No experience is bad experience
Much easier to sell yourself if you can sum yourself up in a sentence
More time to concentrate on your speciality
Diversify - have a look around at other opportunities and always have a back up plan
Don't expect to get a job instantly - work experience is really valuable, meeting people, work on live projects and get your foot in the door
You get out with what you put in with work experience. Make an effort, ask questions, start conversations, get feedback from people etc, need to make an impression
Don't expect your first job to be glamorous - prove what you can do, do everything to a high standard
Practise being fast - need to learn to work fast, the more you push yourself, the more you learn
Keep learning - don't stop learning just because you've started work. Be a sponge and absorb everything. Keep asking about the stuff you're interested in and you can move towards it
Think about what you want - make sure you know what you want and what you're going for is right
Freelance is a lot different to full time work
More creative control and freedom going freelance and has the time to make games in spare time
Got the time to do the stuff you want to do
Downsides: no sick leave, no holidays, has to constantly keep working to get money
Learn to talk about what you do - need to have good communication skills and be able to talk about your work intelligently. Need to be confident when talking about your work
Know your audience and learn how to write - do some research before contacting a company
Find out the name of the person you're emailing
Tailor portfolio to the company and position you're applying for
Don't send out bulk emails
Be proactive - don't sit around waiting for people to come to you
Do anything off your own back, looks good in your portfolio
As a freelancer, got a lot of the work from the people you already knowEverything that Tom mentioned has been reoccurring through each speaker that we've had in to talk. It just makes more of an emphasis that experience is key and it's about the people you know. A lot of this I already knew about (first job won't be glamorous, be proactive, know your audience) but it just reinforced it in my own mind. There's a lot of take in and it's quite scary knowing that I haven't got long before I finish my degree, so right now I'm trying to as much as I can to ensure that I'm prepared for that time. I've been emailing places about work experience and any internships available, as well as connecting with other people to see about potential work collaborations which could help me out next year. I know I need to make more connections so I'm planning on going to more networking events and other festivals in the near future.
Meet interesting people, go to networking events etc
Actively listen to what people have to say
Animation Process
The main focus for myself in this module is the animation, I wanted to push myself further and work with more than one character on the performance and acting of the shots. As I've been working through the shots I've found it quite a challenge in some respects, as I've never really pushed my poses before and trying to achieve more performance is not as easy as I thought it was going to be. I took reference videos of myself but that in itself is something I need to work on. I need to exaggerate more when I do them, I think it's more of a confidence issue and being able to free up and get into the role of my character. In that respect, it's more like acting so I need to be more accustomed to the whole process.
Working my my pre-viz I had worked out the rough timings of each shot and from here I blocked out the main poses in stepped mode, before changing to linear to add in more of the subtle details and then onto spline. Some of the shots that I have been working on have taken me a lot longer than anticipated and has set me back quite a bit on my schedule. At the minute I'm just working through each shot (the majority are all blocked out now) and polishing up the animation. As I've been working through them I've realised I could cut a few of the shots out which will free up some of my time, but also they weren't really needed as they tended to be walking shots. Walking isn't storytelling unless an emotion is portrayed through it, a lot of the time you don't see characters walking to their destination. Instead you see them about to embark and their destination in sight, then in the next shot they arrive. If I had more time I would have liked to keep the shots in, then make the decision when it comes to editing, but at the moment, I have more important shots to complete which attribute more to the storyline.
The animation below is a test I've done with sound. It took me awhile to get the slap sorted, I took a reference video, but also looked at other examples. I think the sound adds more of a believability to it, as without it seems flat. I've added in some extra details, such as the movement/fidgeting when the man is sleeping, I found that without this it was lacking and there needed to be something else. I hadn't really thought about putting this in until the other day and for me, it really makes a difference. I think it still could be improved but for now, I think I'm going to move onto another shot. I find that if I spend too long on one shot I end up adding things that don't need to be there, it's best to get a fresh eye on it on another day. I want to keep adding these extra details in within the other shots, but only when necessary. Before this module I've never really gone into this detail, I've just concentrated on the main pose and left the rest of the body. It's something I need to practice more and get my head around as I always find it quite overwhelming as there is just so much to think about and do, what with overlapping and secondary motion, the little nuances to make it that much more believable. It's a process and hopefully it's something I can keep improving on and will get to a stage where I feel comfortable and happy with what I've produced.
Wednesday, May 8, 2013
Environment
The environment for my animation was something that I didn't feel was as important as other areas, however I still researched into different landscapes and how forest scenes were translated to animated features. I wanted to keep the whole environment simple and designed in a stylised way. The whole animation is set within a forest, until the man comes into a clearing, so for this I wanted to come up with some tree designs and populate my scenes with them. Luckily I got my friend Arron Walker to design and create the trees for me, he will also be texturing my cabin (as seen below). I thought it would be best to get someone else to create these assets for me as it would leave more time for me to animate, and also played to his strengths more. The image below shows some quick concepts of trees, I was just trying out a different style and experimenting with shapes. I think that these are a bit too stylised but by taking the bottom left design, we decided to create pine trees but keeping them to a simple design.
The only other things needed for the environment is the floor, sky and maybe some foliage in the clearing scene. For the floor I think I will get a texture online and edit it together with another in order to achieve the look that I want. I'm happy with the direction it's going at the moment and hopefully it'll be really good once it all comes together.


The only other things needed for the environment is the floor, sky and maybe some foliage in the clearing scene. For the floor I think I will get a texture online and edit it together with another in order to achieve the look that I want. I'm happy with the direction it's going at the moment and hopefully it'll be really good once it all comes together.


Competition Result - 11 Second Club
The voting took place for 11 Second Club and I ended up coming 114th out of 267 entries. I would have been really pleased with myself if I managed to get into the top 100, but for my first attempt I think I did alright. I managed to place in the top half of the entries, which looking at it in that way makes me feel good about what I put out. One of the comments I got from my animation, was that I need to push the poses more. I've never really done this and it's definitely something I can attempt in my next animation. Any pose that you think you've created, it can always be pushed more, that's something I took from an animation analysis by Joe Bowers.
I was really worried to begin with about entering the competition as I felt I wasn't ready and didn't think I could manage lip syncing and performance. I had never really done either before and was scared of being dropped in the deep end. I did come across a few issues with performance and not being able to get the poses that I wanted, and also when it came to polishing I found this a lot harder. I was using a much more complex rig that I was previously used to so this pushed me further, but also got myself used to working with an industry standard rig. It was great being able to have full control over everything and the rig working in the way that I wanted it to.
I think I will be definitely entering future months of 11 Second Club, probably over summer as I will have the most time then. I can see the benefit of doing this as it has improved my skills and pushed me further than I could have anticipated. The higher placing entries are always polished to a high standard and rendered out to a high quality, it will take me a long time to get to this stage, but it's something to aim for.
Exaggerated Performance
This animation is an example of an exaggerated performance. It really fits the style and tone of the piece and you can really see and feel the emotions of the character. In animation, you are always told to push your poses and put more exaggeration into it, obviously it depends on the scene itself and the characters you are using. For the animation below, it works, however if I tried to transfer this into my own animation I think it would be a bit too much. As the animation is really stylised and cartoony it makes sense to have an over the top performance. I really do love the whole shot, the performance flows from one pose to another fluidly and the whole dynamic is really powerful.
I would like to do something like this but I don't think it would be appropriate and wouldn't fit too well, as even though my animation is stylised, it's not cartoony enough to pull off the whole exaggerated performance. That doesn't mean however that I can't still push poses and get the extremes, it just won't be as much as the animation below. I've never really pushed my poses far enough before so it will be a new challenge for myself, as I have to make sure that the poses I create will be believable and fit in with the rest of the performance and the story itself.
Muffin Jack & Jeremy - Acting test from Salesman Pete on Vimeo.
Sunday, April 28, 2013
Storyboards and Pre-viz
I decided to create a pre-visualisation for my animation (found HERE), this is quite a standard thing to do now within the industry and it's normally the layout team which undertake this part. I did this within a few hours just so I could get a better idea of camera angles and timing of the whole animation. It's very rough and some shots are too fast but it's helped me a lot with understanding the different shots and how it will all look when it comes together. I found it hard deciding upon camera angles without seeing how it would look and work out, so by setting it up and creating some pre-viz it helped make my ideas more concreate, and was also able to see what bits still needed improving upon. Visualising in a 3D space is much easier for me to get my head around, and from the pre-viz I was able to complete my storyboards with my chosen camera angles.
The characters that I used are the ones I'm going to be using for my final animation, using them rather than just any model gives a better sense of how the shot is going to play out and how they would fit within the scene. The trees that are shown were just used for layout purposes, I won't be using these ones as they are just from Maya PaintFx and aren't great. I'm getting a friend to work on the trees for me and using the PaintFx ones, also helped him get a better idea of where I was going to be positioning them and in what quantities. In some places there are no trees visible in the pre-viz, mainly because they were very heavy on my computer's processor and I wasn't able to put them in there, they are drawn in the storyboards however. Because of already working out some of the timing in the pre-viz I don't think it's necessary to produce an animatic, however I may go back and add in the dialogue to the pre-viz once it's recorded in order to see how it will all work out together as a whole.


The characters that I used are the ones I'm going to be using for my final animation, using them rather than just any model gives a better sense of how the shot is going to play out and how they would fit within the scene. The trees that are shown were just used for layout purposes, I won't be using these ones as they are just from Maya PaintFx and aren't great. I'm getting a friend to work on the trees for me and using the PaintFx ones, also helped him get a better idea of where I was going to be positioning them and in what quantities. In some places there are no trees visible in the pre-viz, mainly because they were very heavy on my computer's processor and I wasn't able to put them in there, they are drawn in the storyboards however. Because of already working out some of the timing in the pre-viz I don't think it's necessary to produce an animatic, however I may go back and add in the dialogue to the pre-viz once it's recorded in order to see how it will all work out together as a whole.


Character Rigs
For my animation, I have mentioned before about using pre-made rigs. The rigs that I have chosen to use are Morpheus Rig by Josh Burton and a Fox Rig created by mooses on Creative Crash. The images below show the rigs in their standard form. What's great about the Morpheus Rig is that it is fully customisable, body shape, skin colour, textures, you can even add on extra geometry to the character. The UI that's shown with Morphy, is a quick and easy way to change the body shape and features of the face, there are also extra controls built in to change the face shape, it gives you that bit of extra control. The Fox rig, is a simple quadruped, it does the job. I wouldn't have time to build my own and the last one I created needed a lot of changes and fixes for it to work in the correct way. I may change the eye texture at some point, just so it matches with the style of Morphy a bit more.
There's a tutorial on how to change the texture of Morphy, so I will be following that when it comes to creating the clothing texture for my characters. Morphy is really extensive and I think I will be looking more into the features and functions after this module as it has the ability to be changed drastically and this would be a real benefit for myself.


There's a tutorial on how to change the texture of Morphy, so I will be following that when it comes to creating the clothing texture for my characters. Morphy is really extensive and I think I will be looking more into the features and functions after this module as it has the ability to be changed drastically and this would be a real benefit for myself.


Saturday, April 27, 2013
Character Designs / Clothing
As I'm using the morpheus rig, it allows me the flexibility of changing the characters appearance and gender. It's really quite comprehensive and there are also other tools available in order for you to attach other pieces of geometry to the character, and make it deform like the rest of the body when animated. I haven't really had the time to look into these, but it's something I plan to do in my spare time. The image below shows the two characters I came up with when changing around the aesthetic look of the morpheus rig. There is a custom UI built in where you are able to change all the different parts of the body, and there is also other deformers available for that extra control.
The Morpheus rig just comes in a basic grey texture, however this can be changed. I followed this tutorial that was posted on 11 Second Club which takes you through the process of changing out the texture of the grey jumpsuit to the orange one. The original grey texture connection has to be broken in order for you to replace it with a new one and reconnect the smooth node back to the geometry. Following the tutorial, it's a fairly simple process - the orange texture was just what was supplied from the tutorial. You also have to copy the UVs to a new UV set in order for the texture to work. This second UV set is a lot cleaner than the original so when it comes to changing the texture of Morpheus, I would use this orange texture map as a basis and recreate my own.
I have already looked into clothing ideas for the character, but haven't gone into great detail and right now I'm concentrating more on the animation. I'm struggling quite a bit to get everything done on time, but right now the animation is the most important aspect, as if that's not all complete then the story isn't told and my main objective was to produce a decent animation that explore performance. I'll see what can be achieved in the time but it may be that the characters are just in the grey texture for the handin, but I will revisit it after this to complete it all, if this is the case.

Subscribe to:
Posts (Atom)